Even after running an uninstaller, "residue" files often linger in the main GTA V directory. These are typically files that allow the mod to "hook" into the game engine. You should look for and delete the following if they remain: Shaders and Folders: Delete the folder and any associated reshade-shaders DLL Files: ScriptHookV.dll files if you intend to go completely vanilla. Configuration Files: files related to the mod, such as QuantV.ini ReShade.ini The Final Safeguard: Verification
Navigate to the root folder where your game is installed. Depending on your game launcher, the default paths are usually:
d3d11.dll (Note: Ensure this is the ENB version, not a system file. If it sits in the GTA V folder, it belongs to the mod) dxgi.dll ReShade.ini enblocal.ini enbseries.ini QuanTV.ini (if present)
Click the three dots (⋮) next to it, then select Uninstall . Follow any on-screen prompts.
Whether you want to restore your game to its vanilla state, fix performance issues, or switch to an alternative graphic mod like NVE (NaturalVision Evolved), completely removing QuantV requires a thorough cleanup.
Once the program loads, click the button located in the top toolbar. Click Yes when the confirmation prompt appears. Step 3: Install the Uninstaller
This comprehensive guide will walk you through the correct methods to completely remove QuantV from your system, whether you installed it using OpenIV or manual file insertion. Method 1: The Automated Uninstaller (Recommended)
Contains core script files ( QuantV.asi ), configuration files ( QuantV.ini ), and the main asset folder ( QuantV ).
By following these steps carefully, your Grand Theft Auto V installation will be restored to its baseline performance and default visual state, completely free of any QuantV footprints.
OpenIV will ask where you want to install it. option. Installing it directly into the game folder can permanently corrupt your base game files if something goes wrong.
Delete any QuantV-related files inside this directory (such as modified timecycle or visualsettings files).
Alternatively, if QuanTV is the only mod you have installed, you can safely . GTA V will automatically fall back to its pristine default files. Step 4: Verifying Game Files (The Safety Net)
Alternatively, if QuantV is the only mod you had, you can safely delete the entire mods folder from your Windows Explorer directory. Note: This will delete all other vehicle, weapon, and texture mods you have installed. Method 3: Uninstalling QuantV from FiveM
(This is often used for ReShade, but ensure it belongs to QuantV) d3d11.dll d3dcompiler_46e.dll (or _47e ) 3. Restore Modified .rpf Files (If Applicable)
You will see three plugins: ASI Loader , OpenIV.asi , and OpenCamera . Click next to all three.
: Click Install and select the mods folder to remove the modifications safely from your managed mod files. Method 2: Manual Removal
If you get an error or the program isn’t listed:
Even after running an uninstaller, "residue" files often linger in the main GTA V directory. These are typically files that allow the mod to "hook" into the game engine. You should look for and delete the following if they remain: Shaders and Folders: Delete the folder and any associated reshade-shaders DLL Files: ScriptHookV.dll files if you intend to go completely vanilla. Configuration Files: files related to the mod, such as QuantV.ini ReShade.ini The Final Safeguard: Verification
Navigate to the root folder where your game is installed. Depending on your game launcher, the default paths are usually:
d3d11.dll (Note: Ensure this is the ENB version, not a system file. If it sits in the GTA V folder, it belongs to the mod) dxgi.dll ReShade.ini enblocal.ini enbseries.ini QuanTV.ini (if present)
Click the three dots (⋮) next to it, then select Uninstall . Follow any on-screen prompts.
Whether you want to restore your game to its vanilla state, fix performance issues, or switch to an alternative graphic mod like NVE (NaturalVision Evolved), completely removing QuantV requires a thorough cleanup.
Once the program loads, click the button located in the top toolbar. Click Yes when the confirmation prompt appears. Step 3: Install the Uninstaller
This comprehensive guide will walk you through the correct methods to completely remove QuantV from your system, whether you installed it using OpenIV or manual file insertion. Method 1: The Automated Uninstaller (Recommended)
Contains core script files ( QuantV.asi ), configuration files ( QuantV.ini ), and the main asset folder ( QuantV ).
By following these steps carefully, your Grand Theft Auto V installation will be restored to its baseline performance and default visual state, completely free of any QuantV footprints.
OpenIV will ask where you want to install it. option. Installing it directly into the game folder can permanently corrupt your base game files if something goes wrong.
Delete any QuantV-related files inside this directory (such as modified timecycle or visualsettings files). How To Uninstall Quantv
Alternatively, if QuanTV is the only mod you have installed, you can safely . GTA V will automatically fall back to its pristine default files. Step 4: Verifying Game Files (The Safety Net)
Alternatively, if QuantV is the only mod you had, you can safely delete the entire mods folder from your Windows Explorer directory. Note: This will delete all other vehicle, weapon, and texture mods you have installed. Method 3: Uninstalling QuantV from FiveM
(This is often used for ReShade, but ensure it belongs to QuantV) d3d11.dll d3dcompiler_46e.dll (or _47e ) 3. Restore Modified .rpf Files (If Applicable)
You will see three plugins: ASI Loader , OpenIV.asi , and OpenCamera . Click next to all three.
: Click Install and select the mods folder to remove the modifications safely from your managed mod files. Method 2: Manual Removal
If you get an error or the program isn’t listed:
Bài viết liên quan
18-08-2025 17:24
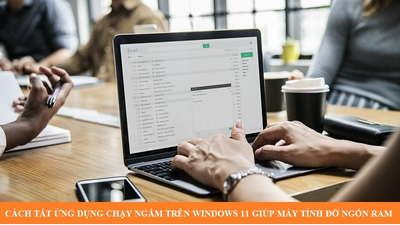
Máy tính Windows 11 của bạn chạy chậm, hao RAM dù không mở nhiều ứng dụng? Nguyên nhân có thể do các ứng dụng chạy ngầm tiêu tốn tài nguyên hệ thống. Trong bài viết này, Techcare.vn sẽ hướng dẫn chi tiết cách tắt ứng dụng chạy ngầm trên Windows 11 giúp máy tính hoạt động mượt mà hơn, tiết kiệm pin và tối ưu hiệu suất toàn hệ thống.
15-08-2025 17:44
Bài viết từ Techcare.vn hướng dẫn chi tiết cách sửa lỗi gõ bàn phím bị loạn chữ trên Windows 10 hiệu quả nhất. Bạn sẽ biết nguyên nhân gây ra lỗi và các bước khắc phục nhanh chóng, giúp bàn phím hoạt động ổn định, gõ chính xác và mượt mà trở lại.
15-08-2025 16:38
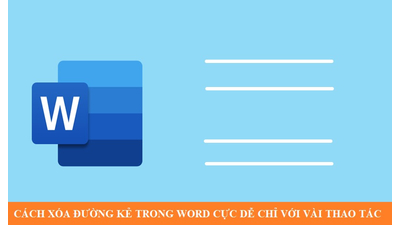
Bạn đang gặp rắc rối với những đường kẻ xuất hiện “vô duyên” trong Word? Bài viết từ Techcare.vn sẽ hướng dẫn bạn cách xóa đường kẻ trong Word cực dễ, chỉ với vài thao tác đơn giản mà ai cũng làm được. Nội dung được trình bày rõ ràng, có hình minh họa, phù hợp cho người mới và cả dân văn phòng muốn tối ưu tốc độ soạn thảo.
12-08-2025 17:07
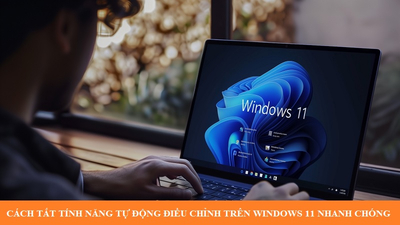
Bạn muốn giữ độ sáng màn hình cố định trên máy tính? Bài viết “Cách tắt tính năng tự động điều chỉnh trên Windows 11 nhanh chóng” từ Techcare.vn sẽ hướng dẫn chi tiết từng bước thao tác, giúp bạn dễ dàng tắt chế độ tự động điều chỉnh độ sáng chỉ trong vài phút.
04-08-2025 14:47
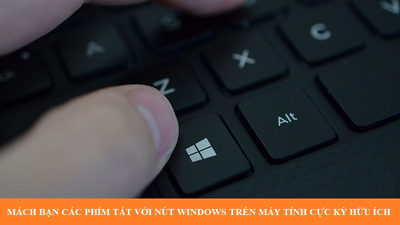
Khám phá ngay các phím tắt với nút Windows trên máy tính giúp bạn thao tác nhanh chóng, tiết kiệm thời gian và nâng cao hiệu suất làm việc. Bài viết từ Techcare.vn sẽ tổng hợp đầy đủ những tổ hợp phím tiện ích nhất, giúp bạn sử dụng Windows một cách chuyên nghiệp và hiệu quả hơn.
01-08-2025 11:08
Tổng hợp các phím tắt trong Word mới nhất giúp bạn thao tác nhanh, soạn thảo và chỉnh sửa văn bản hiệu quả hơn. Techcare.vn mang đến danh sách phím tắt quan trọng, dễ nhớ, phù hợp cho cả người mới lẫn dân văn phòng, giúp tiết kiệm thời gian và nâng cao năng suất làm việc mỗi ngày.
01-08-2025 10:51
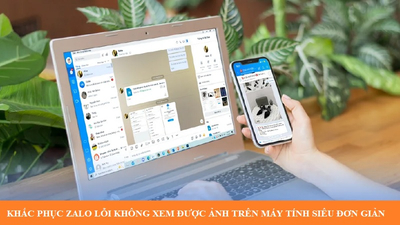
Zalo bị lỗi không xem được ảnh trên máy tính khiến bạn gặp khó khăn khi làm việc hoặc trò chuyện? Bài viết của Techcare.vn sẽ hướng dẫn bạn cách khắc phục nhanh lỗi Zalo không hiển thị ảnh chỉ với vài thao tác đơn giản. Cùng tìm hiểu ngay để khôi phục trải nghiệm sử dụng Zalo mượt mà và hiệu quả nhất nhé!
21-06-2024 16:29
Nếu bạn đang loay hoay không biết phải làm thế nào để đổi Pixel sang Cm trong Photoshop. Hãy yên tâm khi hệ thống Techcare Đà Nẵng sẽ mách bạn mẹo đổi Pixel sang Cm trong Photoshop cực dễ ngay sau đây. Mời các bạn cùng tham khảo nhé!
21-06-2024 06:52
Google Takeout là gì? Cách sử dụng Google Takeout đơn giản nhất – Bài viết giúp bạn hiểu rõ công cụ Google Takeout dùng để sao lưu và tải xuống toàn bộ dữ liệu Google như Gmail, Drive, Photos,… chỉ với vài thao tác. Techcare.vn hướng dẫn chi tiết, trực quan, phù hợp cho cả người mới, giúp bạn quản lý và bảo vệ dữ liệu Google hiệu quả hơn.
17-06-2024 15:43
Có lẽ nhiều người dùng đã gặp phải tình trạng lỗi in Excel không hết trang. Tuy nhiên, không phải ai cũng biết cách sửa lỗi được thực hiện như thế nào? Vì vậy, Techcare Đà Nẵng sẽ bật mí đến các bạn một số mẹo sửa lỗi in không hết trang trong Excel hiệu quả nhất ngay sau đây. Các bạn hãy cùng theo dõi nhé!
15-06-2024 11:57
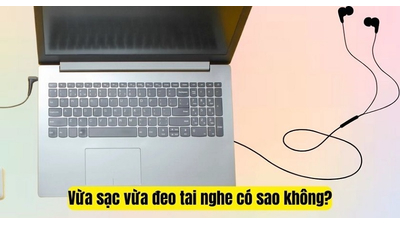
Vừa sạc laptop vừa đeo tai nghe là một thói quen của rất nhiều người dùng hiện nay bởi những tiện ích mà nó mang lại. Tuy nhiên, có nhiều người dùng vẫn thường băn khoăn tằng vừa sạc laptop vừa đeo tai nghe có sao không? Có ảnh hưởng gì hay không? Vậy các bạn hãy cùng Techcare Đà Nẵng làm rõ ngay sau đây nhé!
14-06-2024 16:52
Tiktok được nhiều người dùng biết đến là một trang mạng xã hội video. Tuy nhiên, các bạn có thể dễ dàng trò chuyện, nhắn tin với nhau qua trang mạng xã hội này. Với các bước thực hiện cách nhắn tin trên Tik Tok chi tiết nhất sẽ được Techcare Đà Nẵng hướng dẫn sau đây. Mời các bạn cùng tham khảo nhé!
Techcare.vn và Techcare.net.vn thuộc Công Ty TNHH MTV Quốc Tế Phúc Thành Đạt. Địa chỉ: 133 Hàm Nghi, P.Thạc Gián, Thanh Khê, TP: Đà Nẵng, Việt Nam. Điện thoại: . Email: . Website: techcare.vn. Số ĐKKD/MST: 0401741816 – Do Sở Kế Hoạch Đầu Tư Đà Nẵng Cấp. Copyright Sapphire Tower © 2026